How to Complete KYC for Your haeywa Corporate Prepaid Card
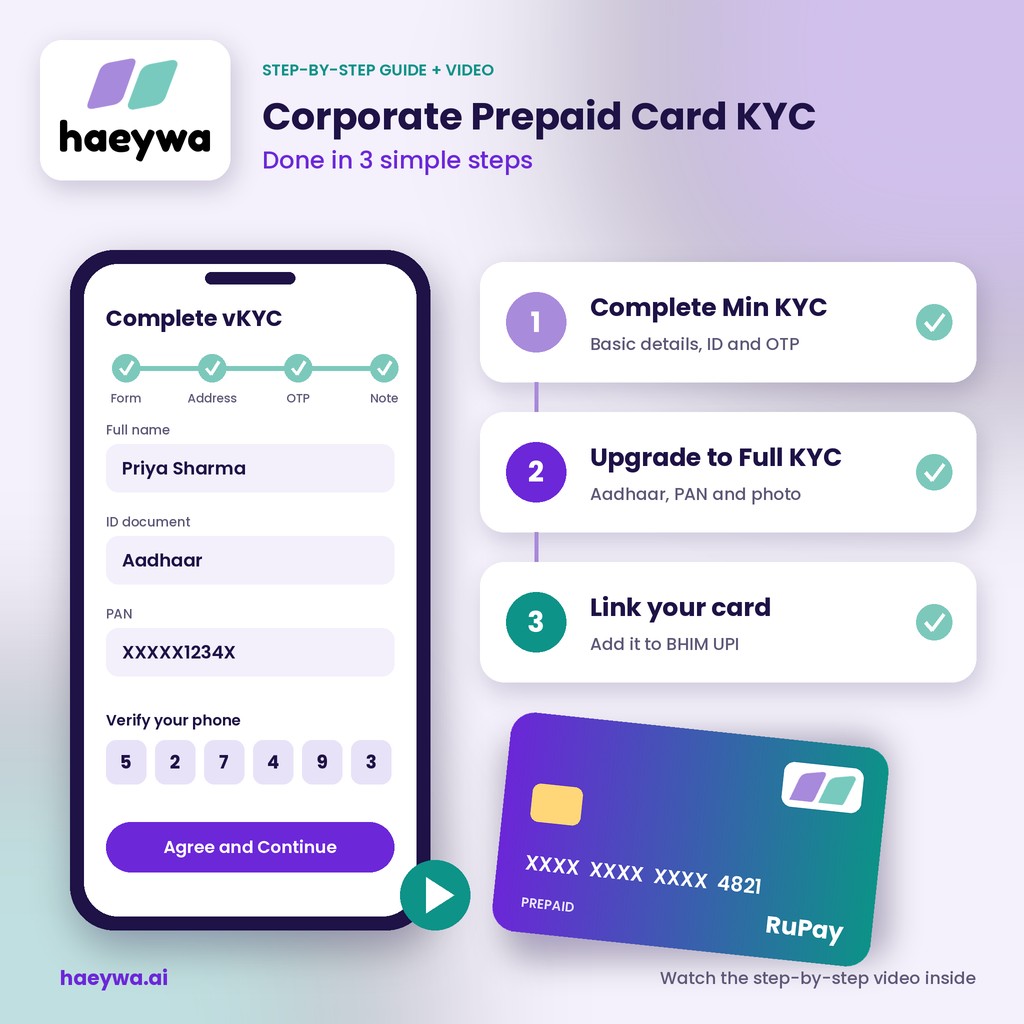
At haeywa, getting your team started with corporate prepaid cards takes only a few minutes in the haeywa app. Before a card can be used, each cardholder completes a quick KYC (Know Your Customer) check, which is required for every prepaid card in India. This guide walks you through the three steps:
- Complete Min KYC
- Upgrade to Full KYC
- Link your corporate prepaid card to the BHIM UPI app
Tap the video below for the simple step-by-step process. If you're new to company cards, our guide on how corporate prepaid cards help control employee spending explains how they work.
Why KYC Is Needed for a Corporate Prepaid Card
Prepaid cards in India are regulated by the Reserve Bank of India (RBI), and every cardholder has to verify their identity before using one. haeywa uses two levels:
- Min KYC: a quick check with basic details and one ID document, so the card can be activated.
- Full KYC: a video KYC with Aadhaar and PAN verification and a short live call with an agent, which unlocks the card's full features and limits.
Both are done from your phone, with no paperwork or branch visit.
Before You Start: Enable the Prepaid Card
The company admin first turns on the card for each employee:
- Open the haeywa app and go to the Members tab.
- Tap the three-dot menu next to the employee's name.
- Select Enable PrePaid Card.
Keep these handy for KYC: your mobile number, an ID document such as Aadhaar or PAN, your address with PIN code, and your original Aadhaar and PAN cards for Full KYC.
Step 1: Complete Min KYC
Once the card is enabled, the employee opens the Cards tab and follows four short stages, shown on a progress bar: Form, Address, OTP and Note.
- Fill in the form: enter your gender and mobile number, choose an ID document (Aadhaar, PAN, Passport, Driving Licence, Voter ID, Job Card or NPR letter) and enter its number.
- Add your address: enter your address, city, PIN code and country.
- Verify your phone number: enter the OTP sent to your registered mobile number and tap Verify.
- Accept the terms: read the note and tap Agree and Continue.
Min KYC is now complete, and it shows with a green tick under KYC Status in the Cards tab.
Step 2: Upgrade to Full KYC
Full KYC is a video KYC (vKYC): you verify your Aadhaar and PAN, then confirm your identity on a short live video call with a verification agent. Keep your original Aadhaar and PAN cards with you before you start.
Start Full KYC in the haeywa app
- In the Cards tab, under KYC Status, tap Full KYC – Initiate.
- On the Complete vKYC form, confirm your full name, father's name, date of birth, gender, mobile number and email.
- Add your permanent and current address. Tick the box if they're the same.
- Enter your Aadhaar and PAN numbers and continue.
Choose a language and give consent
- Pick the language you're most comfortable with, English or Hindi.
- Answer the optional disability question. It's voluntary and used only for compliance and support.
- Read the declaration and tick your consent. It explains that the video call is recorded, a live photo is taken, your Aadhaar and PAN are verified and your live location is captured.
- Check the three-step overview (Aadhaar details, PAN verification and connect with an agent) and tap Start Verification.
Verify your Aadhaar
- Choose Aadhaar OTP (eKYC) and tap Proceed.
- Enter your Aadhaar number or VID, tick the consent and continue.
- Enter the OTP sent to your Aadhaar-registered mobile number.
- Check the details fetched from your Aadhaar, such as your name, date of birth and address, and tap Continue.
Verify your PAN
- Capture the front of your PAN card inside the on-screen frame, or upload a photo from your gallery. Align the card with the borders, use good light and avoid glare.
- Crop or rotate the image if needed and tap Done.
- Make sure every detail is clear and tap Submit, or Retake if it's blurry.
- Check the PAN details read from the card. Tap Edit to fix anything that doesn't match, then tap Proceed.
Add your work details
- Select your occupation and annual income.
- Answer the Politically Exposed Person (PEP) questions, then tap Continue.
Complete the video call
- Choose the language for your video call and tap Start Video Call.
- Read the instructions and tap Join Now.
- Allow camera, microphone and location access when asked.
- Wait for an agent to join. Your queue position is shown on screen.
- During the call, keep your face inside the oval on screen and follow the agent's instructions. You can also use the in-call chat if the audio isn't clear.
When the call ends, you'll see Review in Progress with an Application ID. Your Full KYC is submitted and will be confirmed once the review is complete.
Rolling out cards to your whole team? Book a free demo and see how haeywa makes card setup and KYC simple for every employee.
Step 3: Link Your Corporate Prepaid Card to BHIM UPI
Linking your card to the BHIM UPI app lets you pay with UPI straight from your card balance.
- Open the BHIM UPI app and tap your profile icon at the top left.
- Under Payment Methods, tap Prepaid Account – Tap to Add.
- On the Choose your bank screen, select Livquik Technology India Pvt Ltd.
- Select your prepaid account from the list to link it.
That's it. You're all set to use your haeywa corporate card.
Tips for a Smooth KYC
- Keep your original Aadhaar and PAN cards ready, as the agent may ask to see them on the video call.
- Use a stable internet connection and keep your screen awake throughout.
- Don't refresh, switch apps or open the link in more than one tab during the video call.
- Sit in a well-lit place so your face and documents are clearly visible.
- Match your details exactly to your Aadhaar and PAN, including the spelling of your name.
Why Teams Choose haeywa Corporate Prepaid Cards
Once KYC is done, every card works within the rules finance sets:
- Physical and virtual RuPay cards for in-store and online spending.
- Spending limits and category controls set before any money is spent.
- Department budgets loaded onto each team's cards.
- Real-time tracking of every transaction, with bills captured by AI-powered OCR.
- Freeze or block a card instantly from the app.
Conclusion
Completing KYC for your haeywa corporate prepaid card takes three simple steps: Min KYC to activate the card, Full KYC with a short video call to unlock its full features, and linking the card to BHIM UPI for everyday payments. Everything happens on your phone, and the video shows each step. After that, your team can spend company money with haeywa while finance keeps full control.
Also Check
- How Corporate Prepaid Cards Help Control Employee Spending
- Advantage of haeywa over Traditional Business Credit Cards for Petty Cash Payments
Frequently Asked Questions
What is the difference between Min KYC and Full KYC?
Min KYC is a quick check with basic details and one ID document that activates the card. Full KYC verifies your Aadhaar and PAN through a video KYC with a live agent and unlocks the card's full features and limits.
Which documents do I need for KYC?
For Min KYC, one ID document such as Aadhaar, PAN, Passport, Driving Licence or Voter ID. For Full KYC, your original Aadhaar and PAN cards, plus access to your Aadhaar-registered mobile number for the OTP.
What happens after the video KYC call?
Your KYC is submitted for review and you'll see an Application ID for reference. Your Full KYC is confirmed once the review is complete.
Can I use my haeywa card with UPI?
Yes. haeywa, one of the best corporate prepaid card platforms for Indian businesses, lets you link your card to the BHIM UPI app by adding it as a prepaid account under Payment Methods.
Give Your Team Cards You Control
Book a free demo and see how haeywa corporate prepaid cards give every team a RuPay card with limits, budgets and real-time tracking.
Learn more →